

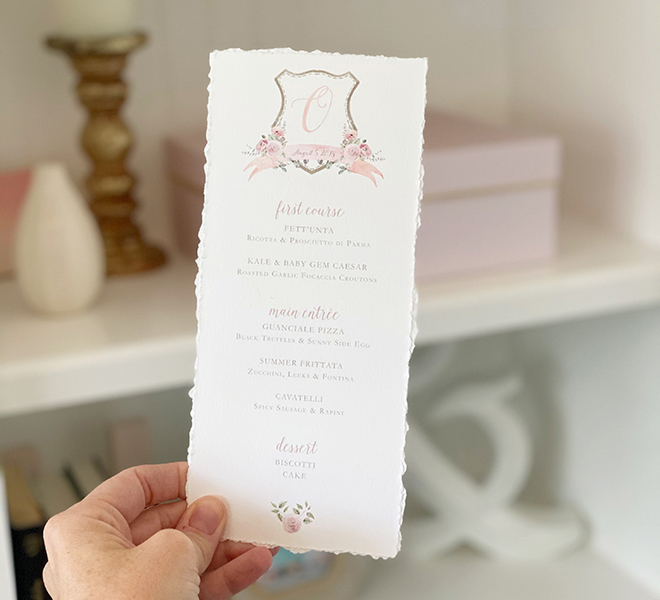
How to Hand Deckle Wedding Invitations
I remember a few years ago when a potential client reached out to me and part of her vision was (as she described) this older, ripped looking paper, kind of like an old map! Huh – excuse me? I had NO clue that this “style” had an official term associated with it. Deckled edging.
I don’t remember, but I think I convinced her of another style that I was familiar with and avoided the situation altogether! Well, she definitely wasn’t the last. Over the next several months, I saw this similar request in some form or another start to roll in and realized that this was a trend that I needed to figure out.
I chatted with my local printer, who actually gave me the proper terminology for it! As well as some ways to achieve it. There were special deckling scissors, there were deckled edge ripping rulers, there were paper makers who made their paper already deckled to certain sizes. There was this whole deckled world.
So over the next few months, I tested the waters with deckled edging and found my sweet spot, and what has now become one of my signature styles for many of my suites.
So today, I wanted to walk you through my steps for deckled edging — a very popular trend in the stationery world right now!
Here is how I keep my deckling simple and sweet and create a soft yet perfect deckle.
Tools Needed:
Skip the fancy scissors and deckling ruler. I tried them, not worth it.
I found that an old fashioned metal ruler with cork backing is my tried and true for hand deckling. I also love using a small mat board to do all my deckling on.
File Setup:
The important thing for hand deckling is actually how you set up your design file before it is sent to print. You will want to take your final design file size and add at least 1.5” all the way around so you will actually be printing your design on an oversized page. (don’t forget to factor this into your pricing!)
So let’s say you’re deckling a 5×7 invite, you will do your 5×7 design and then create a 5×7 hair line border all the way around the design (I do mine in a medium gray, .5 stroke). You will then adjust your document size *not your design* to approximately 8×10. This will leave your design and 5×7 border centered perfectly inside of your 8×10 file. This is the file that you will export and use for printing.
I try to keep my file sizes standard sizes so I am not paying for “custom sizes” when I upload them for print.
A7, 5×7 = 8 x 10
A2, 4.25×5.5 = 8×10 or 8×8
A1 or 4bar, 3.5×4.875 = 5.5×8.5 (A9)
Paper:
When choosing which paper to print on when you plan to deckle, I recommend sticking with 80-100# cardstock. I have found that anything heavier than 100# gets a little harder to grab and rip easily.
In regards to types of paper, I generally try to stick with an eggshell or cotton as those give very nice, organic edges when deckling.
Deckling:
Now that you’re ready to deckle, grab your ruler and mat board and a good Netflix series. While deckling is beautiful, it can be a little time consuming, especially if you are doing 150 sets of a 3-piece suite (150x3x4=1,800 rips!). I do also recommend breaking it up into a few days if you have a lot as your fingers will start to really ache after a while!
You will want to take your ruler and line it up just on the *inside* of your hairline border you created. Hold it tight with your left hand and then from the top right corner, grab the paper and rip down and inward using that ruler as a guide and ripping against the edge of the ruler.
Tip: I generally rip the right and left sides first and then the top and bottom.
Rinse and repeat!
In case you’re more a visual person, I have a quick video below!
These are the steps and processes that have worked for me to achieve a beautiful deckled edge that my clients love. Try different methods, papers and techniques until you find what works best for you!
Heather


PLEASE COMMENT BELOW
share this post on