

How to Create a Digital Wax Seal Mock Up for Proofs
How to Create a Digital Wax Seal Mock Up for Proofs
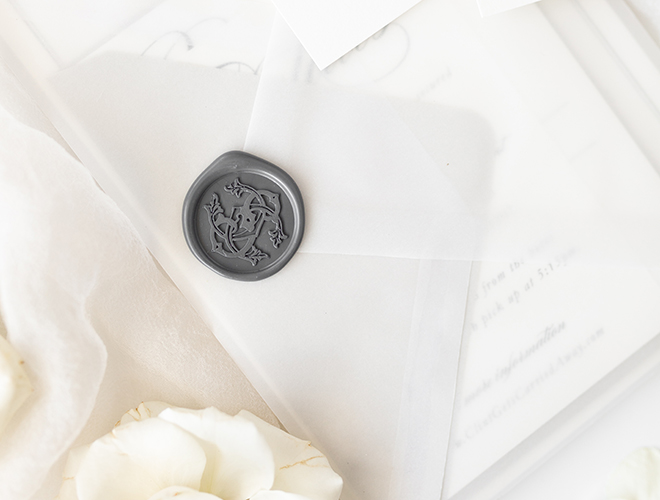
Wax seals are absolutely beautiful in person. But how do you portray that beauty realistically in a digital mock-up when you are showing your clients their stationery proofs? They’ll want to know what their color and design will look like and how it will go with their full suite and I totally get it!
So, today I wanted to chat about how I create digital wax seals for mock-up and proofs. I am a huge fan of Artisaire, my exclusive go-to for wax seals for my clients. They have an amazing product and an amazing team, win win!
I would say about 75% of my couples use wax seals in some capacity in their invitation suites. So when I first started creating mockups for their proofs, I really struggled when it came to showing them what their wax seal would look like.
First (before Artisaire) I would find a wax seal stock image in the color they wanted, or I would have to colorize it in photoshop and I would just show them that image with a black and white design of their wax seal design next to it. I didn’t even attempt to overlay it to look realistic.
Then, along came Artisaire with their amazing wax seals and resources. If you’re a Pro Partner with them (free!) you have access to their blank wax seal library. Beautiful, design-free PNG files of all of the colors they offer!
So I decided to put my skills to work and take their blank seals and create a realistic mock-up that I could start using in my proofs! Below is a walk-thru of the steps I take If you’re more of a visual person, I also created this short video to show you!
Step One
Create your wax seal design in InDesign or Illustrator in black and white vector. You can scale it to approximately 1”x1” depending on your intended wax seal size.
Step Two
Choose your wax seal color and drag the PNG into Photoshop
Copy your vector design from AI or ID and paste into Photoshop
Resize and center to fit inside of wax seal
Step Three
Open Layer Styles
Make the following changes to the below sections. Be sure to turn on your preview button so you can watch as you make changes.
Bevel & Emboss
Style: Outer Bevel
Depth: 95% (you can up this number if you want a deeper impression look)
Size: 1px
Soften: 0px
Color Overlay
I change the color overlay to a darker hue of my wax seal. So if I am using an antique gold wax seal, I select a darker spot or shadow with the eyedropper to pull in a chocolate brown maybe. Just play with the color selection until you achieve the look you want.
Gradient Overlay
Turn on gradient overlay, leave to default settings. This just allows a slight gradient for a more realistic look.
Drop Shadow
Opacity: 4%
Distance: 0px
Spread: 0px
Size: 1px
BONUS!
If you need to adjust the actual color of a wax seal, you can add a “hue/saturation” layer and click the box “colorize” and play with the sliding scales to get a color you want!
Step Four
And finally, you’ll want to export it as a PNG (so there is a transparent background) and drop it into your proof!
You can also go ahead and save the Photoshop file as a template so you can simply copy and paste the layer style for next time!
And there you have it! You can play with any of these settings to get the perfect look you are going for!
Heather


PLEASE COMMENT BELOW
share this post on