

How to Use a Cricut to DIY your Own Die Cut Stationery
Over the years, I have had to “teach” myself many things in the stationery world. Lots of Google and trial and error. Most of the techniques that I’ve had to learn along the way are what have allowed me to grow and expand my service and offerings to my clients. I remember the first time someone asked me if I could add foil to an invitation, or if I offered deckled edge paper, or if I could design a custom envelope liner. Some of these things may be pretty straightforward now that I do them day in and day out. But I remember the way my heart would race at the mention of these “new” techniques.
But instead of shying away from these new techniques, I buckled down and learned how to make them happen. I’m at a point in my stationery business where I do outsource a majority of my production, but there are a few things that I do like to keep in-house for sake of time, control, and overhead.
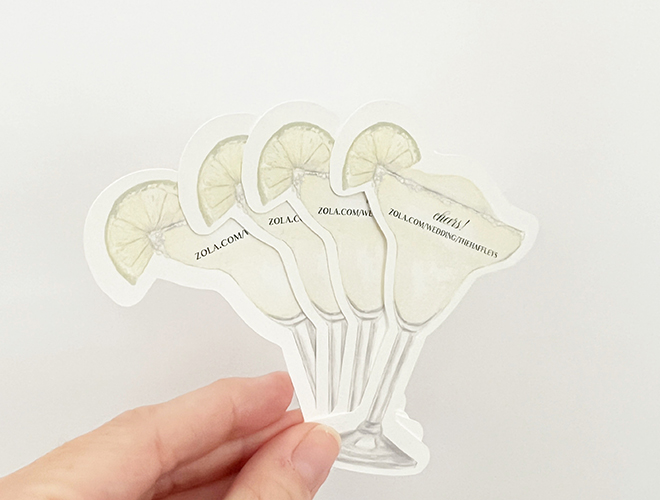
One of the requests that I kept seeing pop up were custom-cut additional cards for a suite or as place cards or favor tags. I know that many professional printers can offer die-cut services, but that does usually come with a high price tag and a longer turnaround time. So – I decided to put my Cricut Maker to work and see if it was something I could do myself!
And guess what – with a little trial and error, it did not disappoint! I have been able to design custom-cut cards that I had printed through Printswell Fulfillment services or with my HP452 and then use my Cricut Maker to cut them out. Check out my steps below to see how I was able to make this happen if it is something you’re interested in trying as well!
Setting Up Your Design Files
Once you have your design approved, set it up in an 8.5×11 design file with however many you are able to get on a page. I set my top and left margin at 1”. This will come in handy later when you are trying to set up your cut file in the Cricut Design Space software to make sure that your cut easily lines up with your print.
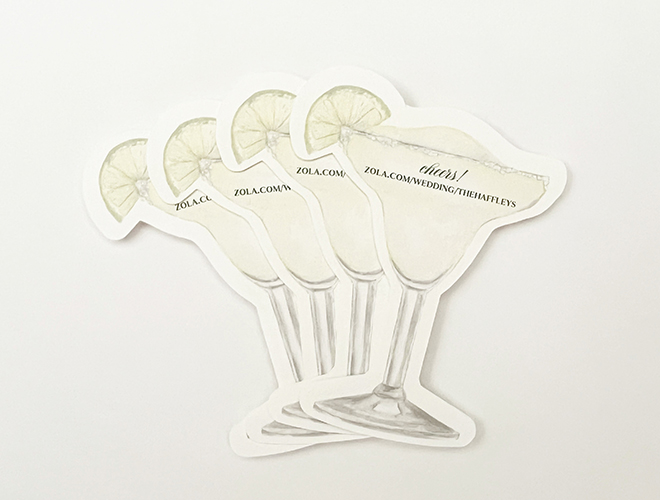
If you are cutting a shape around an image/picture, you will need to create an offset of that shape for your Cricut to recognize for a cutting path. For instance, I cut out the below margarita image, but I just needed the outline of the cup for cutting purposes. So I was able to create an image offset in Illustrator that just creates a stroke in the shape of that image. I personally prefer to have a thick white border around my custom cuts for design aesthetic as opposed to having the Cricut cut right up to the edge of the image like a full bleed.
I use InDesign to set up my print file and my cut file. I start with page 1 which has the print image AND the cut line/stroke together to make sure they are lined up perfectly. Then I duplicate that page and on page 1 I delete the print portion so only the outline/stroke of the shape is there and is still butted up to that 1” top and left margin exactly (don’t move anything at this point!).
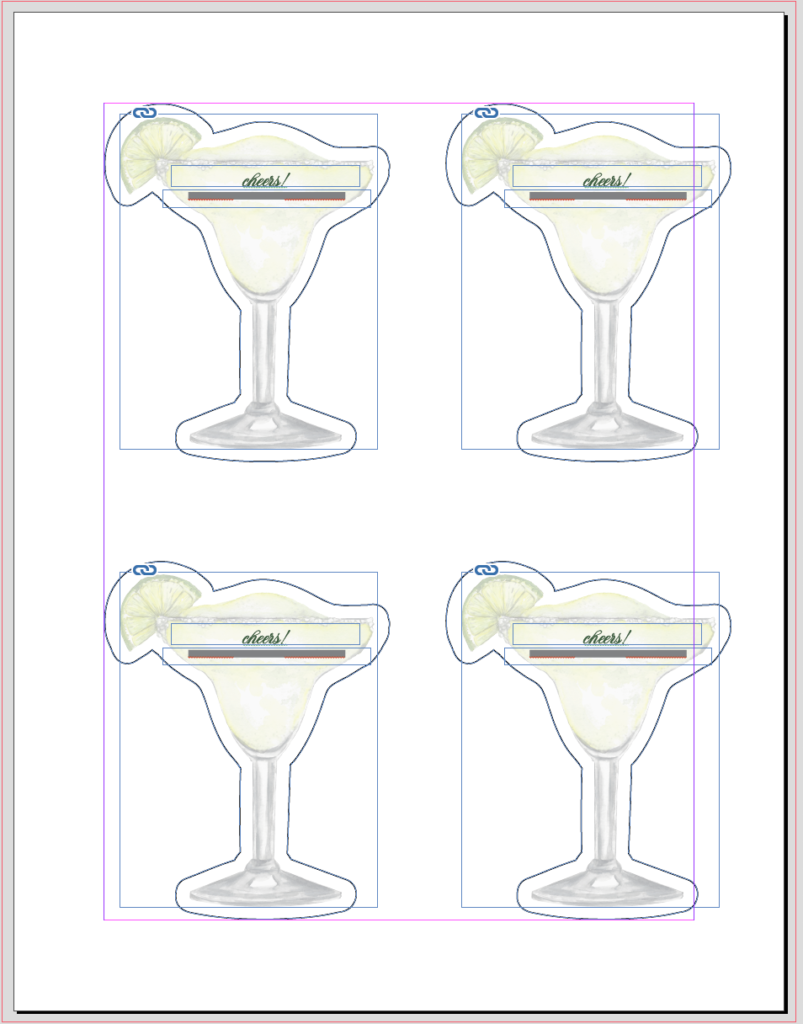
Then that 2nd page is the actual print image and I delete the outline/cut lines so the only thing left is the image to be printed. Again – don’t move anything, this image will be slightly away from that 1” border if you’re leaving white space inbetween the image and the cut edge.
Page 1 – CUT FILE ONLY
Page 2 – PRINT FILE ONLY

Do not make any adjustments to the files at this point because you want to make sure that if you were to overlay the two they would still line up perfectly.
At this point, I export the print file as I normally would to send to my printer and then I export the cut file as a JPEG to import into Cricut Design Space.
Setting up your files in Cricut Design Space
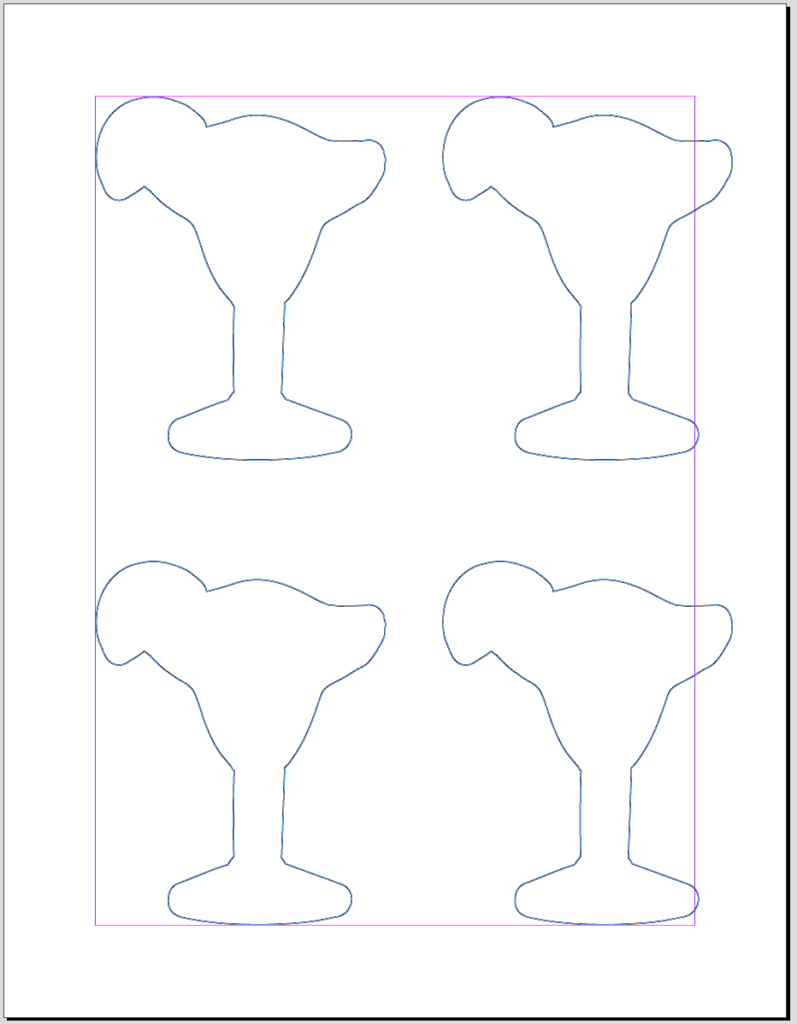
When you have your print files and are ready to cut, you’ll want to start a new project in your Cricut Design Space and upload the JPEG image you exported of your cut file. I choose “simple” as my image type.
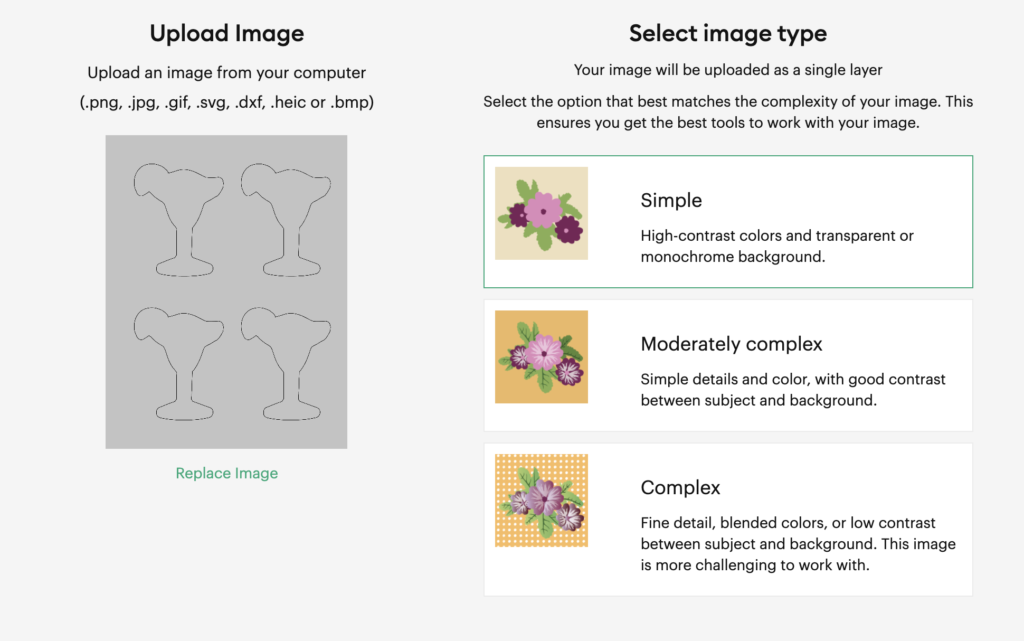
For the background remover section, you will only want to remove the EXTERIOR of the shapes, not the interior. If you remove the interior, the Cricut will try to double cut the line.

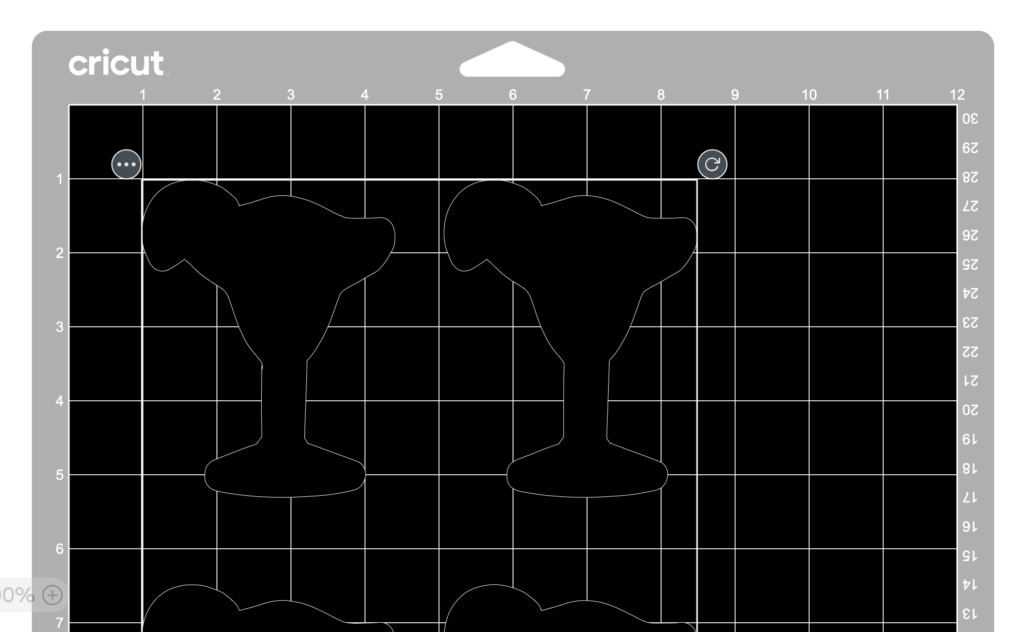
Once it’s uploaded, you’ll want to add it to your canvas. It will import it at a large size on your artboard so I go in and make sure to resize it based on the size it should be (I copy the width or height from my InDesign file to it is exact!). And be sure to make sure your proportions are locked to avoid distorting!
Don’t worry about where you place it on your artboard, just that it’s the exact proportions it needs to be.
Now you’re ready to “make it”. This is where you will make sure that your top left corner is lined up exactly to the 1” top and left margin (this is why we set it up like this in our design file!).
You will place your printed piece on your mat in the upper left corner and this will allow the cut file that you placed at your 1” margins to line up perfectly!
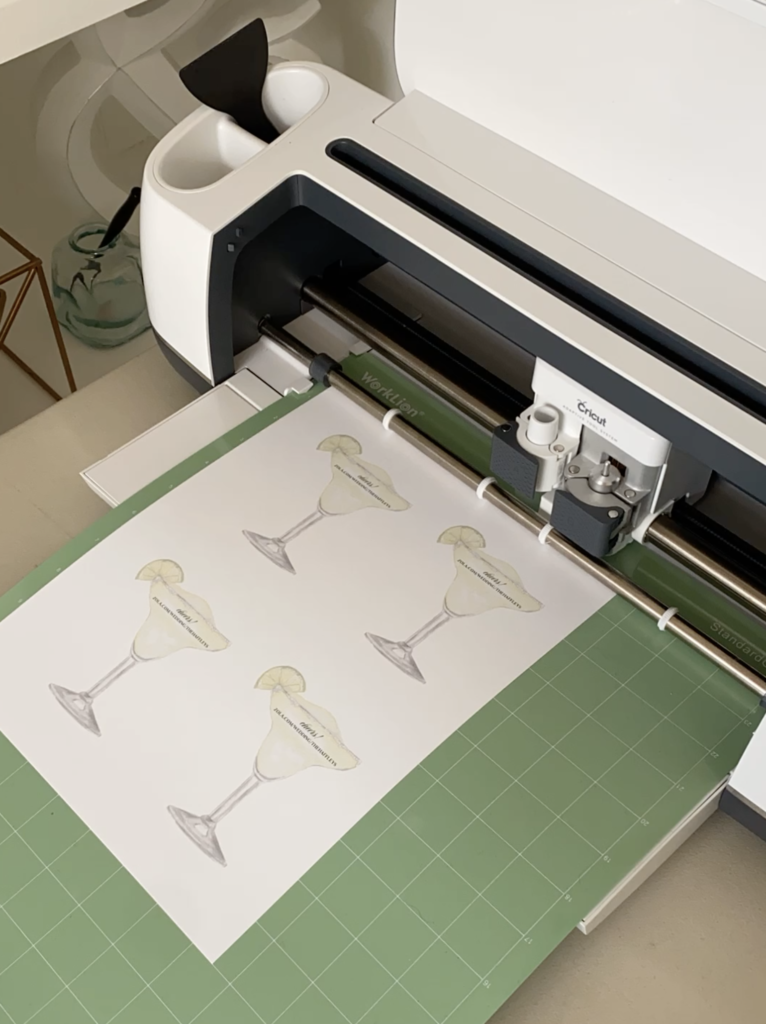
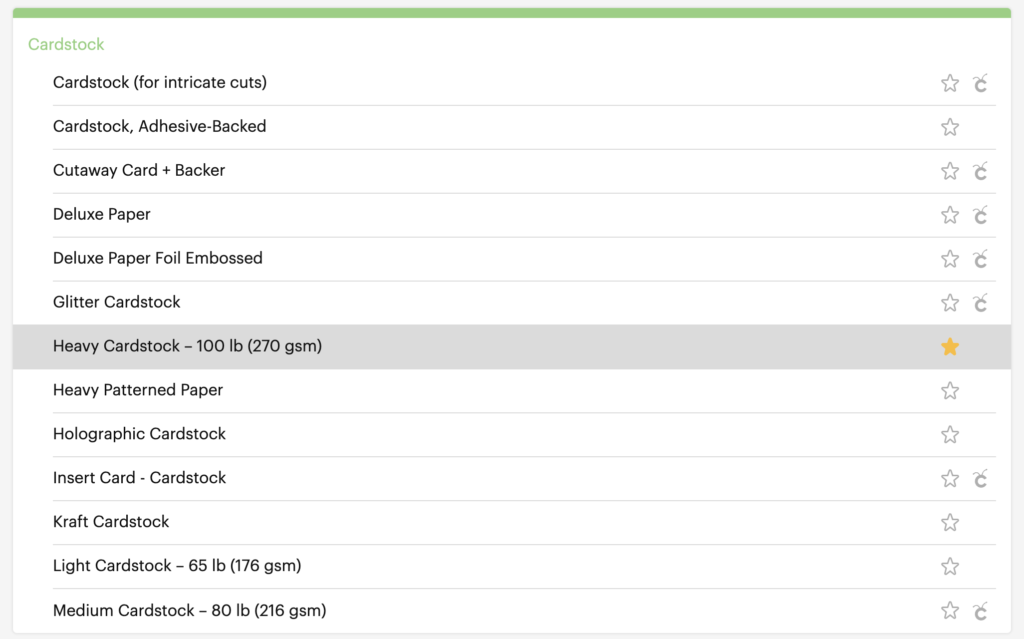
For my cut settings, I select “Heavyweight Cardstock 100lb” as my material, and then I make sure to go into the “material settings” and adjust the cut pressure to the highest it will allow to make sure it can get fully through the cardstock.

Whew – this was a long one but I truly hope it is helpful if this is something you’re considering! Really just get in there and play with it and see what works for you! I’ve used my Cricut Maker to make custom-cut favor tags, place cards, and detail cards!
Heather


Hu Heather.
Thanks for taking the time out to explain it to a T. I can’t wait to sit and try this method step by step!