

How to DIY edge paint your own stationery
I know I have mentioned that I tend to outsource most of my production and it really is so nice to hand it off to the professionals to let them do what they do best! But there are times when I do have to improvise and do some things myself. That could either be due to time restraints, expenses or just simply not being able to find a vendor to do what you need.
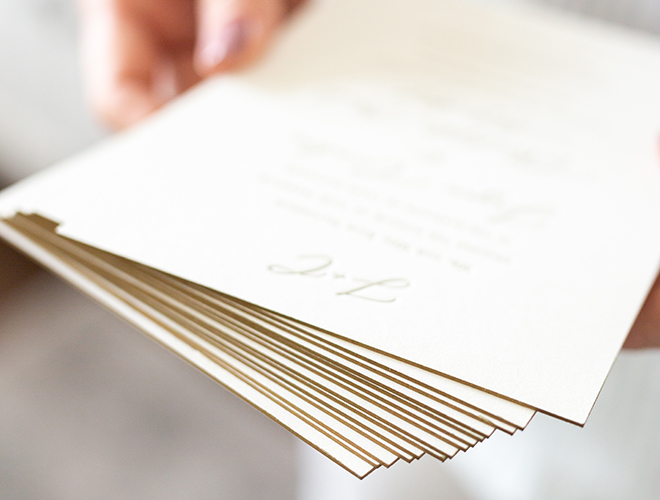
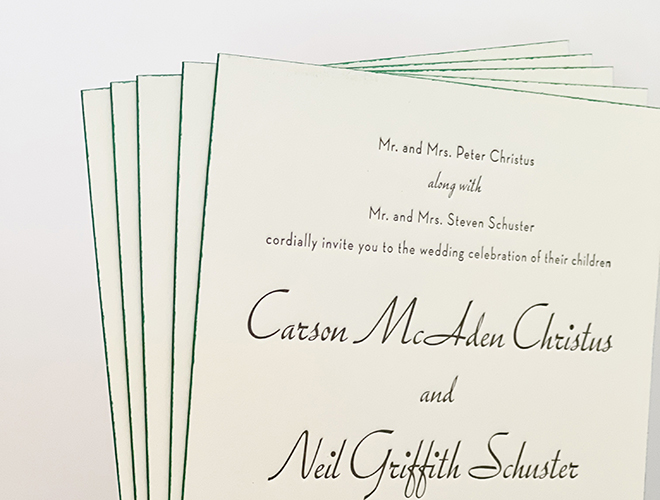
Generally, when I have my invitations edge painted, it’s on letterpress suites and I have my letterpress printers take care of the edge painting for me. However, when a client wanted edge painting with their digitally printed suite, I had to get creative as my digital printer doesn’t offer edge painting services and I honestly didn’t want to have to ship it to a finishing service if I didn’t have to.
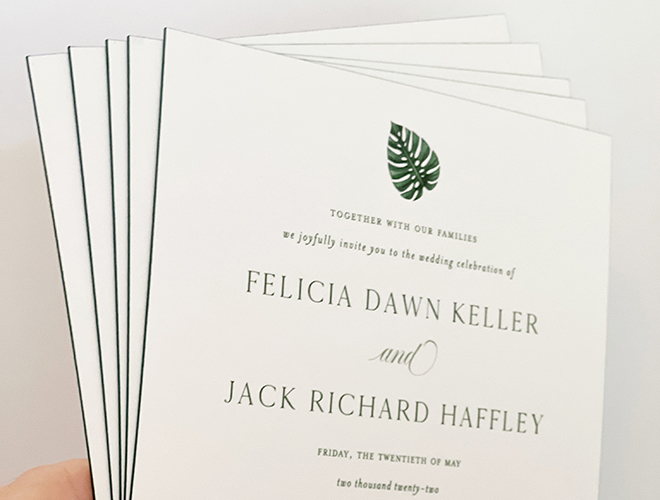
So I had their suite printed on #220 double-thick eggshell coverstock from Printswell Fulfillment Services and then started experimenting with different ways to paint the edges myself.
I tested out some extras I had on the same stock with 3 different types of paint. Below are what I used and the results from each as well as the setup I used for it. I will say that I have seen people successfully edge paint many ways, but this is what personally worked best for me and achieved the results I wanted for my client!
Sandwich Press Setup
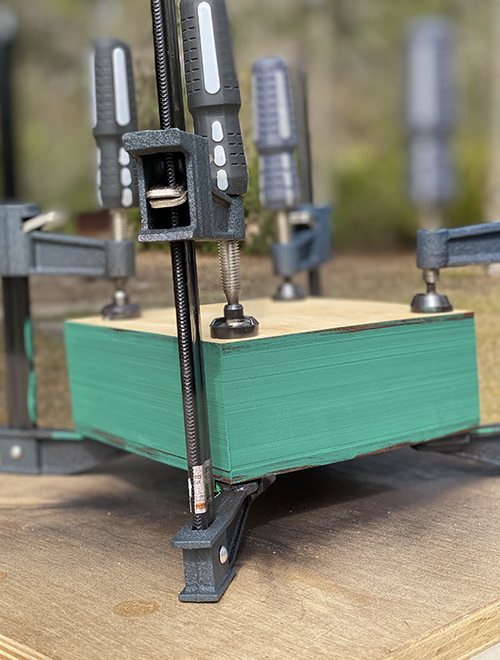
First, I wanted to chat about my setup. I knew that when I was doing these, I would have to create some sort of sandwich press to ensure there was enough pressure on the stack so the paint wouldn’t run through. You can order professional ones offline, but I knew that I could improvise with items I had around the shop.
I took four 6” quick release bar clamps from Harbor Freight and two pieces of ¼” wood cut to the same size as my invitation size and set them up with a board on the top and bottom of my stack to create the sandwich and placed the clamps in each corner diagonally so I could still have room to maneuver my paint easily. I also only worked with about 50 invitations in a stack, since I didn’t want to chance too large of a stack at one time. Make sure that your clamps are on tight to apply a solid and even amount of pressure to your stack to eliminate paint seeping through the sides.
Spray Paint
First I tested just a standard spray paint from Home Depot, this was the easiest application, but the least desired result. The spray paint was way too thin and bled through the sides so matter how much pressure I had on it. Clearly not a winner.
Acrylic Paint
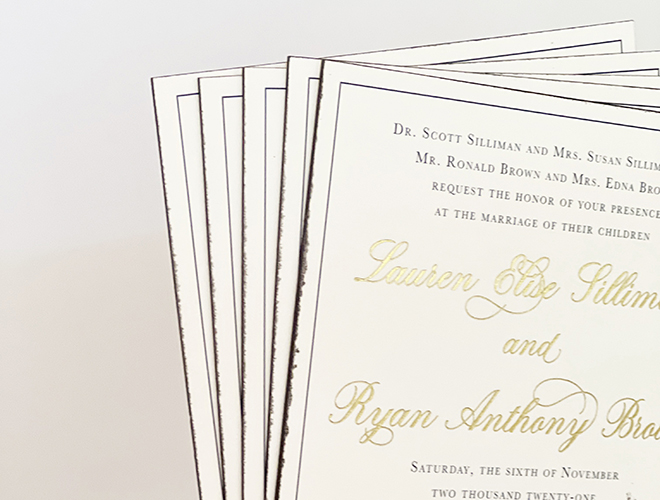
Next, I tested out just a tube of acrylic paint from the craft store with a sponge brush. I painted on two thin coats with about 15 minutes in between to dry. The edges looked great, but when I released the clamps to look at the invites, it didn’t have a clean/crisp edge on the invitations and didn’t look professional at all.
Fabric Paint
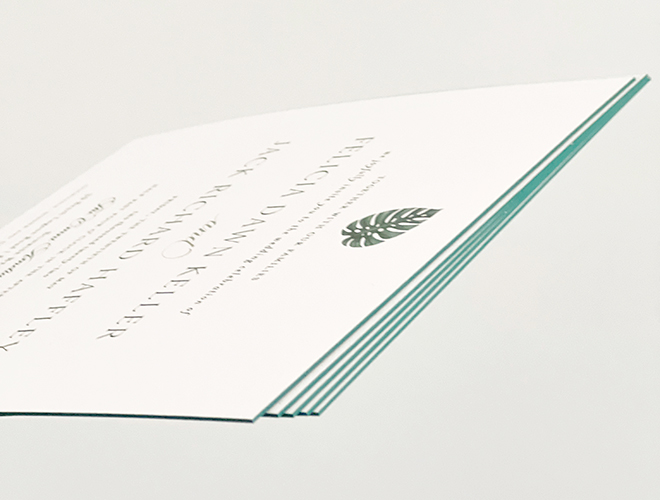
Finally, after wracking my brain on what to try next, I found a tube of Tulips fabric paint that I had from the craft store. Fabric paint is designed to not bleed/run when applied to fabrics, so I figured I would give it a shot with paper! I did the same technique as the acrylic, two thin coats with about 15 minutes in between to dry. When I checked my test invites, it was perfection! NO run at all and clean crisp lines! It was exactly what I wanted.
Once I finished my stack, I did separate them all out and lay them flat to dry really well for about an hour or so before restacking them together.
I hope this simple way to DIY your own edge painting on your stationery was super helpful!
Heather


would this work on a thinner card stock?
Hi Megan! Honestly, I would only do it on a 200# cover stock or higher. It needs that thickness to grab the ink for the edges. I would be a lot harder with thinner paper and may bleed through to the front/back of the cards.
Just followed your process on a set of invitations and they look great! However I had a question/concern- did you find that the edges feel a little ‘sticky’ with the fabric paint, even after letting dry for a few hours?
Hi! I honestly haven’t noticed them being sticky after letting them dry for a bit! You separated them all out to let them dry, right? It may have to do with how thick you put it on? I usually do 2 light coats and it seems to work great!